1
 →
→
On-device wake word detection powered by deep learning







Made in Vancouver, Canada by Picovoice

Porcupine is a highly-accurate and lightweight wake word engine. It enables building always-listening voice-enabled applications. It is
Porcupine is the right product if you need to detect one or a few static (always-listening) voice commands.
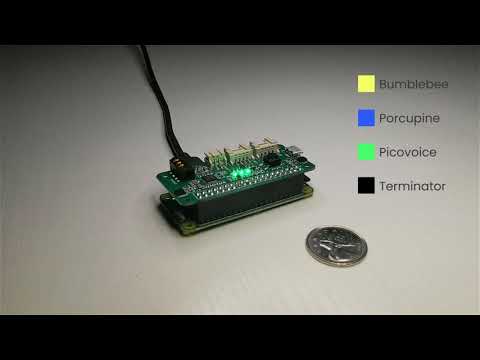
A comparison between accuracy and runtime metrics of Porcupine and two other widely-used libraries, PocketSphinx and Snowboy, is provided here. Compared to the best-performing engine of these two, Porcupine is 11.0 times more accurate and 6.5 times faster (on Raspberry Pi 3).
If using SSH, clone the repository with:
git clone --recurse-submodules [email protected]:Picovoice/porcupine.git
If using HTTPS, clone the repository with:
git clone --recurse-submodules https://github.com/Picovoice/porcupine.git
Install the demo package:
sudo pip3 install pvporcupinedemo
With a working microphone connected to your device run the following in the terminal:
porcupine_demo_mic --access_key ${ACCESS_KEY} --keywords porcupine
The engine starts processing the audio input from the microphone in realtime and outputs to the terminal when it detects
utterances of Porcupine.
For more information about Python demos go to demo/python.
From demo/dotnet/PorcupineDemo run the following in the terminal to build the demo:
dotnet build -c MicDemo.Release
Make sure there is a working microphone connected to your device. From demo/dotnet/PorcupineDemo run the following in the terminal:
dotnet run -c MicDemo.Release -- \
--access_key ${ACCESS_KEY} \
--keywords porcupine
The engine starts processing the audio input from the microphone in realtime and outputs to the terminal when it detects
utterances of Porcupine.
For more information about .NET demos go to demo/dotnet.
Make sure there is a working microphone connected to your device. Then invoke the following commands from the terminal:
cd demo/java
./gradlew build
cd build/libs
java -jar porcupine-mic-demo.jar -a ${ACCESS_KEY} -k porcupine
The engine starts processing the audio input from the microphone in realtime and outputs to the terminal when it detects
utterances of Porcupine.
For more information about Java demos go to demo/java.
To run the Porcupine demo on Android or iOS with Flutter, you must have the Flutter SDK installed on your system. Once installed, you can run flutter doctor to determine any other missing requirements for your relevant platform. Once your environment has been set up, launch a simulator or connect an Android/iOS device.
Run the prepare_demo script from demo/flutter with a language code to set up the demo in the language of your
choice (e.g. de -> German, ko -> Korean). To see a list of available languages, run prepare_demo without a language code.
dart scripts/prepare_demo.dart ${LANGUAGE}
Replace your AccessKey in lib/main.dart file:
final String accessKey = "{YOUR_ACCESS_KEY_HERE}"; // AccessKey obtained from Picovoice Console (https://console.picovoice.ai/)
Run the following command from demo/flutter to build and deploy the demo to your device:
flutter run
To run the React Native Porcupine demo app you will first need to set up your React Native environment. For this, please refer to React Native's documentation.
Replace your AccessKey, in App.tsx file:
_accessKey: string ="${YOUR_ACCESS_KEY_HERE}" // AccessKey obtained from Picovoice Console (https://console.picovoice.ai/)
Navigate to demo/react-native/PorcupineDemo to run the following commands:
For Android:
yarn android-install          # sets up environment
yarn android-run ${LANGUAGE}  # builds and deploys to Android
For iOS:
yarn ios-install              # sets up environment
yarn ios-run ${LANGUAGE}      # builds and deploys to iOS
Replace ${LANGUAGE} with the language code of your choice (e.g. de -> German, ko -> Korean).
To see a list of available languages, run the android-run or ios-run command without a language code.
Using Android Studio, open
demo/android/Activity as an Android project, copy your AccessKey into MainActivity.java, select the build variant (Build > Select Build Variant...) for the desired language and then run the application.
To learn about how to use Porcupine in long-running services go to demo/android/Service.
To learn about how to use Porcupine with Android Speech to Text recognition go to demo/android/STT.
The BackgroundService demo runs audio recording in the background, enabling detection of wake word while the application is not in focus and remains running in the background. The ForegroundApp demo runs wake word detection only when the application is in focus.
1) To run the demo, go to demo/ios/BackgroundService.
2) Open the BackgroundService.xcodeproj in XCode
3) Replace let accessKey = "${YOUR_ACCESS_KEY_HERE}" in the file ViewModel.swift with your AccessKey.
4) Run the demo with a simulator or connected iOS device
To run the foreground application demo:
1) Go to demo/ios/ForegroundApp directory.
2) Open the ForegroundApp.xcodeproj in XCode
3) Replace let accessKey = "${YOUR_ACCESS_KEY_HERE}" in the file ViewModel.swift with your AccessKey.
4) Go to Product > Scheme and select the scheme for the language you would like to demo (e.g. esDemo -> Spanish Demo, deDemo -> German Demo)
5) Run the demo with a simulator or connected iOS device
The demo allows you to select any of the pre-built keywords for detection. Press start and say the selected keyword.
From demo/web run the following in the terminal:
yarn
yarn start ${LANGUAGE}
(or)
npm install
npm run start ${LANGUAGE}
Open http://localhost:5000 in your browser to try the demo.
From demo/react run the following in the terminal:
yarn
yarn start ${LANGUAGE}
(or)
npm install
npm run start ${LANGUAGE}
Open http://localhost:3000 in your browser to try the demo.
Install the demo package:
yarn global add @picovoice/porcupine-node-demo
With a working microphone connected to your device run the following in the terminal:
ppn-mic-demo --access_key ${ACCESS_KEY} --keywords porcupine
The engine starts processing the audio input from the microphone in realtime and outputs to the terminal when it detects
utterances of Porcupine.
For more information about NodeJS demos go to demo/nodejs.
The C demo requires CMake version 3.4 or higher.
The Microphone demo requires miniaudio for accessing microphone audio data.
Windows Requires MinGW to build the demo.
At the root of the repository, build with:
cmake -S demo/c/. -B demo/c/build && cmake --build demo/c/build --target porcupine_demo_mic
List input audio devices with:
./demo/c/build/porcupine_demo_mic --show_audio_devices
Run the demo using:
./demo/c/build/porcupine_demo_mic -l ${LIBRARY_PATH} -m lib/common/porcupine_params.pv \
-k resources/keyword_files/${PLATFORM}/porcupine_${PLATFORM}.ppn -t 0.5 \
-d ${AUDIO_DEVICE_INDEX} -a ${ACCESS_KEY}
Replace ${LIBRARY_PATH} with path to appropriate library available under lib, ${PLATFORM} with the
name of the platform you are running on (linux, raspberry-pi, or mac), ${AUDIO_DEVICE_INDEX} with
the index of your audio device and ${ACCESS_KEY} with your AccessKey.
List input audio devices with:
.\\demo\\c\\build\\porcupine_demo_mic.exe --show_audio_devices
Run the demo using:
.\\demo\\c\\build\\porcupine_demo_mic.exe ^
-l lib/windows/amd64/libpv_porcupine.dll ^
-m lib/common/porcupine_params.pv ^
-k resources/keyword_files/windows/porcupine_windows.ppn ^
-t 0.5 ^
-d ${AUDIO_DEVICE_INDEX} ^
-a ${ACCESS_KEY}
Replace ${AUDIO_DEVICE_INDEX} with the index of your audio device and ${ACCESS_KEY} with your AccessKey.
The demo opens an audio stream and detects utterances of Porcupine.
At the root of the repository, build with:
cmake -S demo/c/. -B demo/c/build && cmake --build demo/c/build --target porcupine_demo_file
Run the demo using:
./demo/c/build/porcupine_demo_file -l ${LIBRARY_PATH} -m lib/common/porcupine_params.pv \
-k resources/keyword_files/${PLATFORM}/porcupine_${PLATFORM}.ppn -t 0.5 \
-w resources/audio_samples/multiple_keywords.wav -a ${ACCESS_KEY}
Replace ${LIBRARY_PATH} with path to appropriate library available under lib, ${PLATFORM} with the
name of the platform you are running on (linux, raspberry-pi, or mac) and ${ACCESS_KEY} with your AccessKey.
Run the demo using:
.\\demo\\c\\build\\porcupine_demo_file.exe ^
-l lib/windows/amd64/libpv_porcupine.dll ^
-m lib/common/porcupine_params.pv ^
-k resources/keyword_files/windows/porcupine_windows.ppn ^
-t 0.5 ^
-w resources/audio_samples/multiple_keywords.wav ^
-a ${ACCESS_KEY}
Replace ${ACCESS_KEY} with your AccessKey.
The demo opens up the file and detects utterances of Porcupine.
For more information about C demos go to demo/c.
There are several projects for various development boards inside the mcu demo folder.
Install the Python SDK:
pip3 install pvporcupine
The SDK exposes a factory method to create instances of the engine:
import pvporcupine
AccessKey obtained from Picovoice Console (https://console.picovoice.ai/)
access_key = "${ACCESS_KEY}"
handle = pvporcupine.create(access_key=access_key, keywords=['picovoice', 'bumblebee'])
keywords argument is a shorthand for accessing default keyword files shipped with the library. The default keyword
files available can be retrieved via
import pvporcupine
print(pvporcupine.KEYWORDS)
If you wish to use a non-default keyword file you need to identify its path:
import pvporcupine
AccessKey obtained from Picovoice Console (https://console.picovoice.ai/)
access_key = "${ACCESS_KEY}"
handle = pvporcupine.create(
    access_key=access_key,
    keyword_paths=['path/to/non/default/keyword/file'])
When initialized, valid sample rate can be obtained using handle.sample_rate. The required frame length
(number of audio samples in an input array) is handle.frame_length. The object can be used to monitor
incoming audio as follows:
import pvporcupine
AccessKey obtained from Picovoice Console (https://console.picovoice.ai/)
access_key = "${ACCESS_KEY}"
handle = pvporcupine.create(access_key=access_key, keywords=['porcupine'])
def get_next_audio_frame():
    pass
while True:
    keyword_index = handle.process(get_next_audio_frame())
    if keyword_index >= 0:
        # Insert detection event callback here
        pass
Finally, when done be sure to explicitly release the resources using handle.delete().
Install the .NET SDK using NuGet or the dotnet CLI:
dotnet add package Porcupine
The SDK exposes a factory method to create instances of the engine:
using Pv;
const string accessKey = "${ACCESS_KEY}";
var keyword = new List { BuiltInKeyword.PICOVOICE };
Porcupine handle = Porcupine.FromBuiltInKeywords(accessKey, keyword);
Using the FromBuiltInKeywords constructor allows you to initialize the Porcupine engine to detect any of the free, built-in keywords that come with the library. These built-ins are represented by the BuiltInKeyword enum.
If you wish to use a custom keyword file (i.e. a keyword file generated by Picovoice Console, with a .ppn extension), you need to specify its path:
const string accessKey = "${ACCESS_KEY}";
var keywordPaths = new List {
    "/absolute/path/to/keyword/one",
    "/absolute/path/to/keyword/two",
    ... }
Porcupine handle = Porcupine.FromKeywordPaths(accessKey, keywordPaths);
When initialized, the required sample rate can be obtained using handle.SampleRate. Expected frame length
(number of audio samples in an input array) is handle.FrameLength. The object can be used to monitor
incoming audio as below:
short[] getNextAudioFrame()
{
    // .. get a frame of audio
    return audioFrame;
}
while(true)
{
    var keywordIndex = handle.Process(getNextAudioFrame())
    if(keywordIndex >= 0)
    {
        // .. Insert detection event callback here
    }
}
Porcupine will have its resources freed by the garbage collector, but to have resources freed immediately after use,
wrap it in a using statement:
using(Porcupine handle = Porcupine.FromBuiltInKeywords(
    accessKey,
    new List { BuiltInKeyword.PICOVOICE }))
{
    // .. Porcupine usage here
}
The Porcupine Java binding is available from the Maven Central Repository at ai.picovoice:porcupine-java:${version}.
import ai.picovoice.porcupine.*;
// AccessKey obtained from Picovoice Console (https://console.picovoice.ai/)
final String accessKey = "${ACCESS_KEY}";
try {
    Porcupine handle = new Porcupine.Builder()
                        .setAccessKey(accessKey)
                        .setBuiltInKeyword(BuiltInKeyword.PORCUPINE)
                        .build();
} catch (PorcupineException e) { }
The setBuiltInKeyword() builder argument is a shorthand for accessing built-in keyword model files shipped with the package.
The list of built-in keywords can be found in the BuiltInKeyword enum, and can be retrieved by:
import ai.picovoice.porcupine.*;
for(BuiltInKeyword keyword : BuiltInKeyword.values()) {
    System.out.println(keyword.name());
}
If you wish to use a custom keyword file (i.e. a keyword file generated by Picovoice Console, with a .ppn extension) you need to the file path as demonstrated below:
import ai.picovoice.porcupine.*;
// AccessKey obtained from Picovoice Console (https://console.picovoice.ai/)
final String accessKey = "${ACCESS_KEY}";
try {
    Porcupine handle = new Porcupine.Builder()
                        .setAccessKey(accessKey)
                        .setKeywordPath("path/to/custom/keyword/file")
                        .build();
} catch (PorcupineException e) { }
When initialized, valid sample rate can be obtained using handle.getSampleRate(). Expected frame length
(number of audio samples in an input array) is handle.getFrameLength(). The object can be used to monitor
incoming audio as below:
short[] getNextAudioFrame() {
    // .. get audioFrame
    return audioFrame;
}
while(true) {
    int keywordIndex = handle.Process(getNextAudioFrame());
    if(keywordIndex >= 0) {
        // .. detection event logic/callback
    }
}
Once you're done with Porcupine, ensure you release its resources explicitly:
handle.delete();
Add the Porcupine Flutter plugin to your pub.yaml.
dependencies:
  flutter_porcupine: ^
The SDK provides two APIs:
PorcupineManager provides a high-level API that takes care of audio recording. This class is the quickest way to get started.
The static constructor PorcupineManager.fromBuiltInKeywords will create an instance of the PorcupineManager using one or more of the built-in keywords.
import 'package:porcupine_flutter/porcupine_manager.dart';
import 'package:porcupine_flutter/porcupine_error.dart';
// AccessKey obtained from Picovoice Console (https://console.picovoice.ai/)
final String accessKey = "{ACCESS_KEY}";
void createPorcupineManager() async {
    try {
        _porcupineManager = await PorcupineManager.fromBuiltInKeywords(
            accessKey,
            [BuiltInKeyword.PICOVOICE, BuiltInKeyword.PORCUPINE],
            _wakeWordCallback);
    } on PorcupineException catch (err) {
        // handle porcupine init error
    }
}
To create an instance of PorcupineManager that detects custom keywords, you can use the PorcupineManager.fromKeywordPaths static constructor and provide the paths to the .ppn file(s).
 // AccessKey obtained from Picovoice Console (https://console.picovoice.ai/)
final String accessKey = "{ACCESS_KEY}";
_porcupineManager = await PorcupineManager.fromKeywordPaths(
    accessKey,
    ["/path/to/keyword.ppn"],
    _wakeWordCallback);
Once you have instantiated a PorcupineManager, you can start/stop audio capture and wake word detection by calling:
try {
    await _porcupineManager.start();
} on PorcupineException catch (ex) {
    // deal with either audio exception
}
// .. use porcupine
await _porcupineManager.stop();
Once the app is done with using PorcupineManager, be sure you explicitly release the resources allocated to Porcupine:
await _porcupineManager.delete();
There is no need to deal with audio capture to enable wake word detection with PorcupineManager. This is because it uses flutter_voice_processor plugin to capture frames of audio and automatically pass it to the wake word engine.
Porcupine provides low-level access to the wake word engine for those who want to incorporate wake word detection into an already existing audio processing pipeline.Porcupine has fromBuiltInKeywords and fromKeywordPaths static constructors.
```dart import 'package:porcupine_flutter/porcupine_manager.dart'; import 'package:porcupine_flutter/porcupine_error.dart';
// AccessKey obtained from Picovoice Console (https://console.
→ →
→ →
→ →
→ →
→ →
→