1
 →
→
A beautiful screenshot + screen recording + Loom alternative - all native, self hostable and free.
fayazara/Screendrop is an open-source project on GitHub, mainly written in Swift. A beautiful screenshot + screen recording + Loom alternative - all native, self hostable and free. It currently holds 2,075 stars and 95 forks with 32 open issues, and was last pushed on 2026-09-16 (repository created 2026-04-26).
Git Homed tracks it on the Today's Trending board.
A beautiful screenshot + screen recording + Loom alternative - all native, self hostable and free.

[!IMPORTANT]
Screendrop is under active development. Expect rough edges and occasional breaking changes
1. Download the latest Screendrop.dmg using the button above or from the releases page.
2. Open the DMG and drag Screendrop into your Applications folder.
3. Launch Screendrop. It lives in the menu bar at the top-right of the screen.
The download button always points to the newest release.
Requirements: macOS 26.4 or newer.
Install from the Homebrew tap:
brew install --cask fayazara/tap/screendrop
Update later with:
brew upgrade --cask screendrop
Screendrop can also update itself through Sparkle.
Screendrop can be controlled from its menu bar item or with global hotkeys.
| Default shortcut | Action |
| --- | --- |
| Option + 1 | Capture full screen |
| Option + 2 | Capture a window |
| Option + 3 | Capture an area |
| Option + 4 | Open the screen-recording picker |
| Option + 5 | Capture text (OCR) to the clipboard |
All five shortcuts are customizable under Settings → Screenshots and Settings → Screen Recordings. If a replacement shortcut cannot be registered, Settings explains the failure and keeps your previous working shortcut.
You can also:
Capture an entire display, a window, or a freely selected area. Screenshots are taken at native display resolution and imported into the local Library before any optional automation runs.
Screenshot preferences include:
Capture Text (Option + 5, or the menu bar) drags out an area like a normal
area capture, recognizes the text inside it with on-device Vision OCR, and puts
that text on the clipboard. No image is saved, nothing is added to Library, and
no preview card appears - a brief toast confirms what was copied.
Recognized lines are returned in reading order, so multi-column screenshots paste in the order you read them rather than the order Vision happened to find them.
Choose exactly what happens after every screenshot:
New captures appear as floating cards on the active display. From a card you can:
Opening Save keeps a screenshot preview available if you cancel or saving fails. If a screenshot cannot be written to the configured export folder, choose another location or retry from the error dialog.
A recording card is a quick handoff: it closes once Studio has loaded successfully or a manual Save or Upload from the card succeeds. Failed or cancelled actions keep the card available for retry. Exporting or sharing from Studio or Library also clears that recording's card; the recording remains in Library. Studio shows Saved with a Finder reveal action, or Link Copied with actions to copy or open the share link, without creating another overlay.
When the stack is collapsed, it becomes a small peek tab instead of disappearing. This keeps captures close without covering the workspace.
Library brings screenshots, videos, and complete recording projects into one native macOS window, replacing the History page and separate Recording Projects browser. The sidebar filters All Captures, Screenshots, and Recordings. Switch between thumbnail grid and list views, search by name, or sort by capture date, name, and last modification. The layout, sort order, and inspector visibility are remembered.
The browser uses reusable AppKit collection cells, background package discovery, and a bounded thumbnail cache with cancellable loading. The inspector shows dimensions, capture dates, duration, disk usage, editable-project state, file location, and cloud sharing actions. Recording packages and their History entries appear as one capture; existing files and edits stay where they are.
Screendrop registers as an image editor in Finder. Opening an image with Screendrop:
1. Validates the image. 2. Imports a copy into the Screendrop Library. 3. Opens the copy in the annotation editor.
The original file is never modified. Multiple selected images can be opened at once, each in its own editor window.
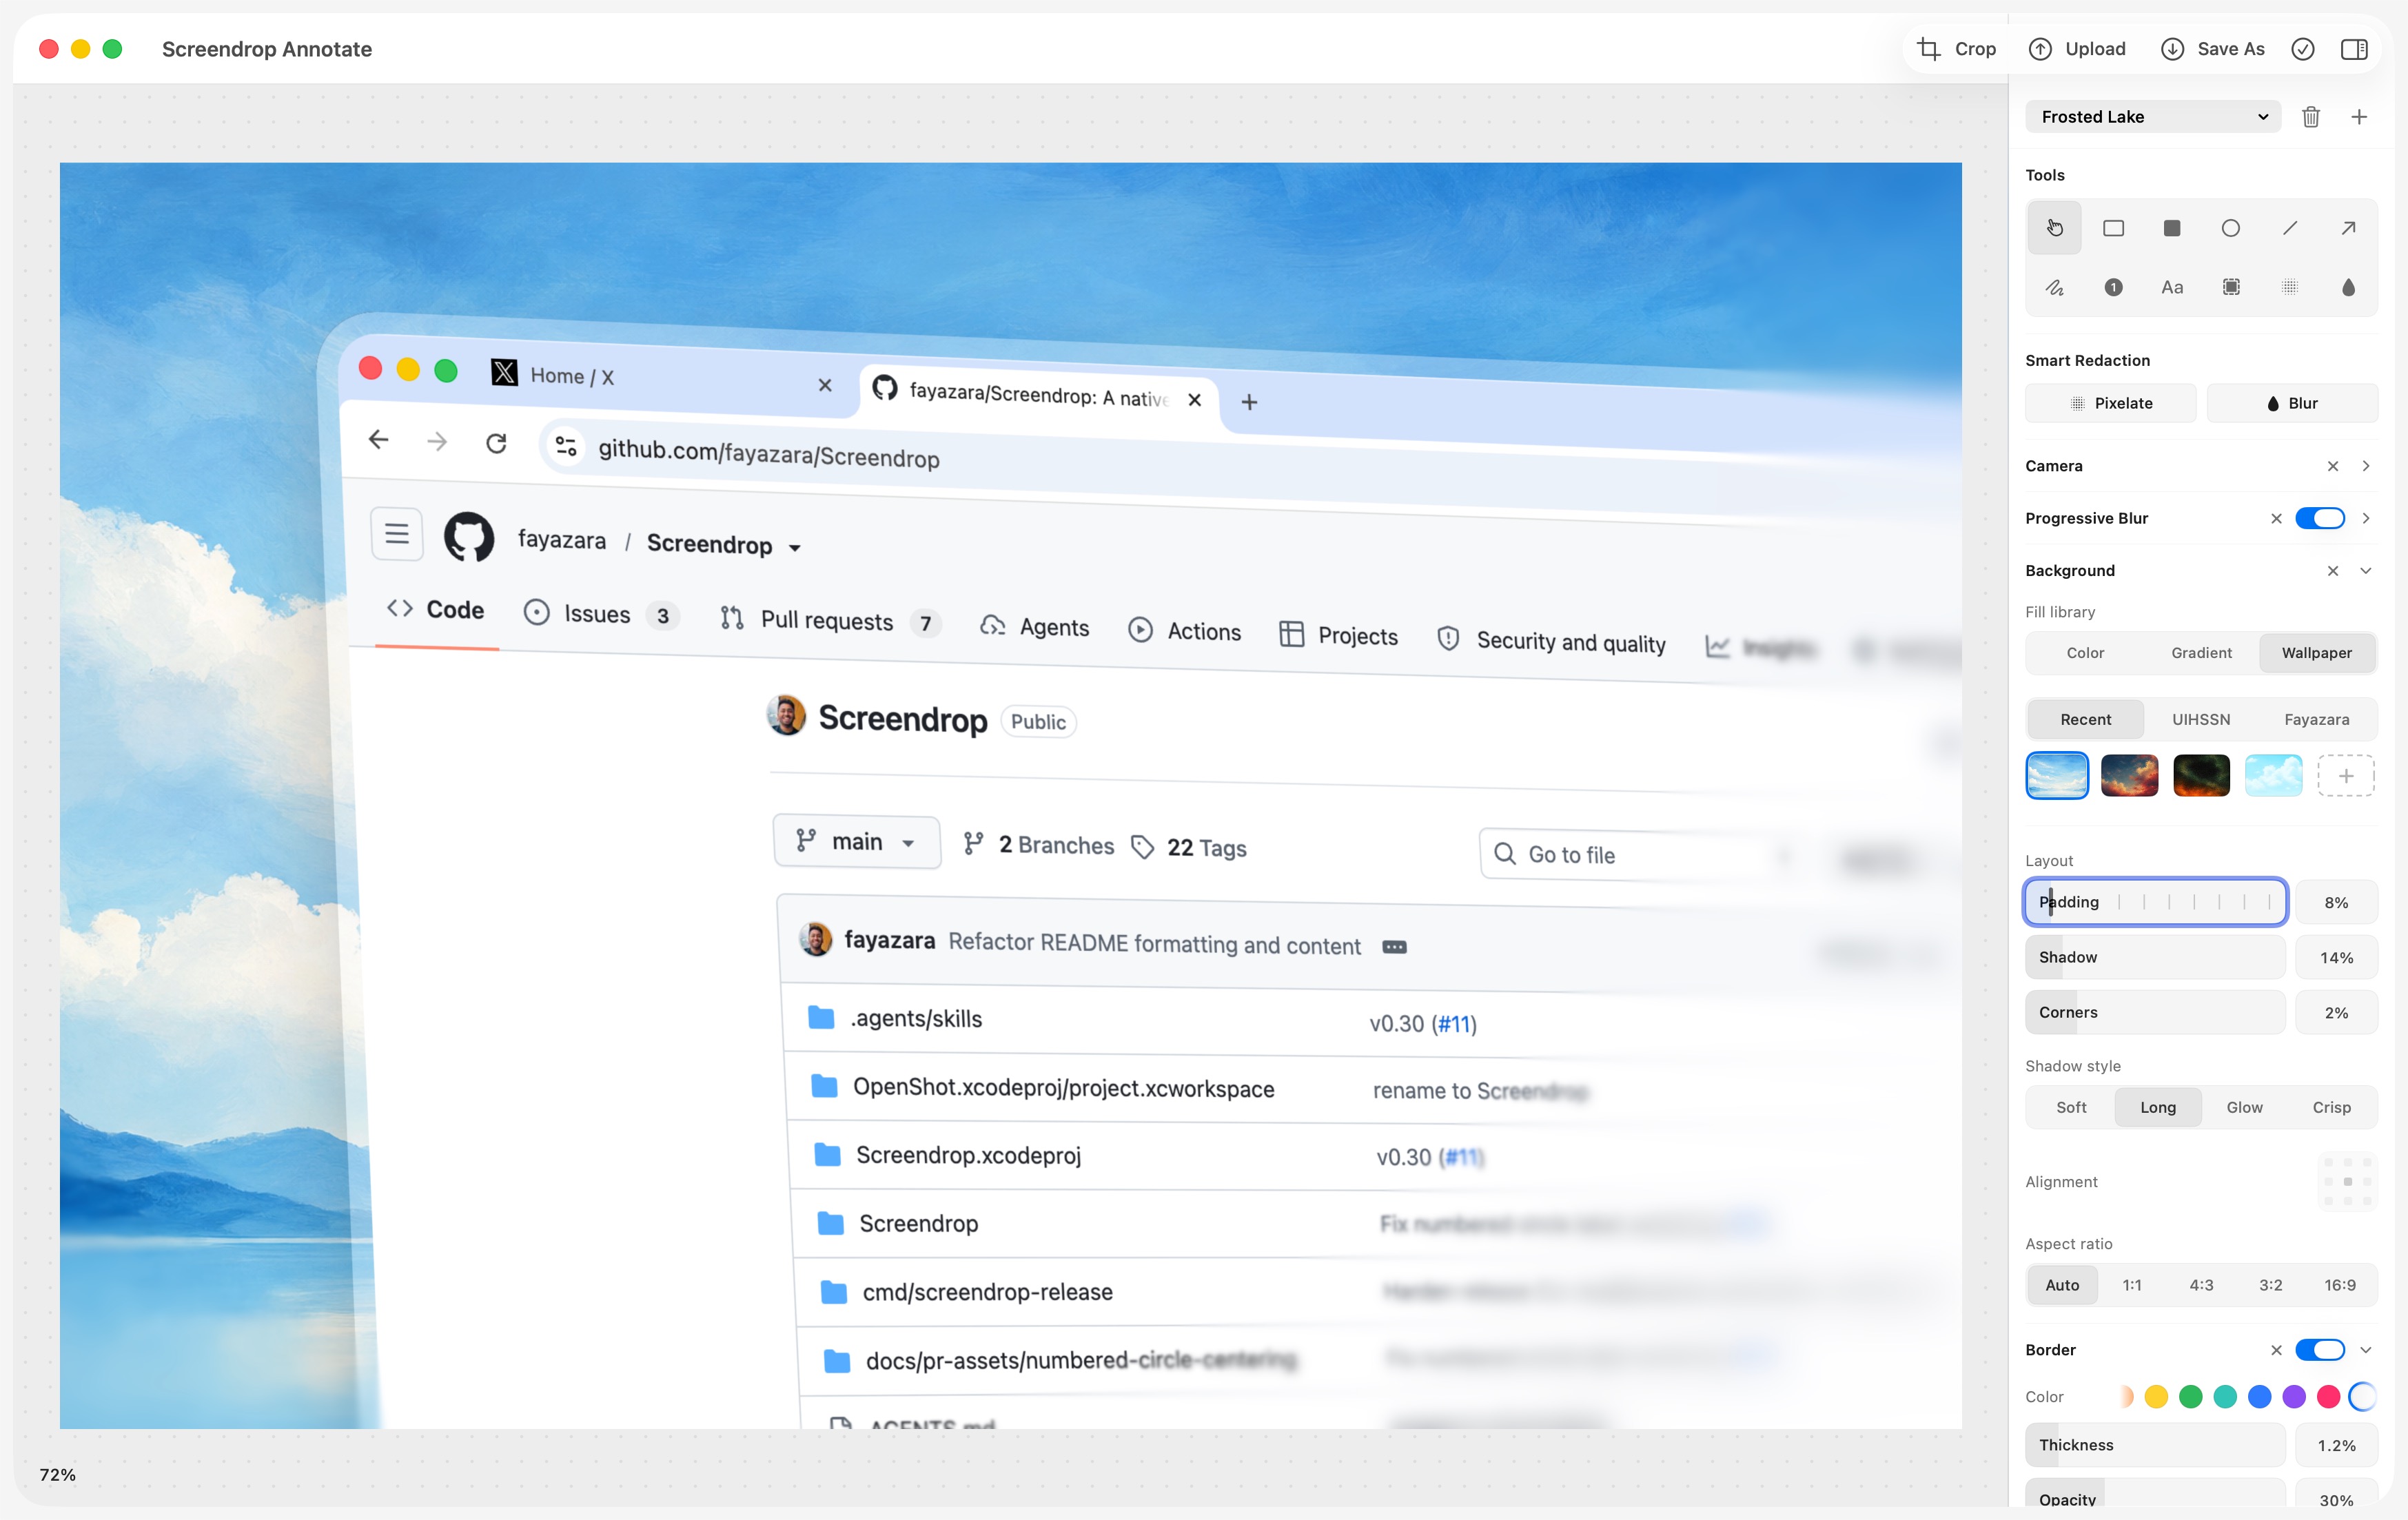
The annotation editor is non-destructive. Screendrop preserves the untouched base image and writes editable state to a neighboring .screendrop sidecar, so saved annotations can be reopened and changed later. Display previews are lightweight, while final renders use the source image's full pixel resolution.
Save, Done, and Upload coordinate screenshot commits so conflicting saves cannot overlap. Failed commits keep the editor open with its changes unsaved; file replacements retain recovery copies until the image and editable files are written successfully. Upload also works on screenshots without annotations. Recording Studio likewise stays open when Save and Close cannot save the project.
Available tools include:
Crop at full resolution with freeform, original, 1:1, 16:9, 9:16, 4:3, and 3:2 presets. Crops remap existing annotations into the new image coordinates and participate in undo and redo.
Turn a plain screenshot into a finished visual without leaving Screendrop:
.screendroppreset JSON files.The canvas zoom menu offers Fit Canvas (⌘1), actual size (⌘0), and zoom in/out (⌘+/⌘−), up to 1000%. Fit leaves breathing room around the composition; zoomed content uses the full editor workspace. Pinch or hold ⌘/Option while scrolling to zoom around the pointer, and scroll to pan. Pinch zoom keeps its starting image point fixed until a canvas edge constrains the view. Menu and keyboard zoom use the center of your current view. Panning stops at the composition edges; axes that fit inside the viewport stay centered. Fit recenters the whole composition. These controls change only the editing view, not the exported image.
Shared presets include portable colors, gradients, layout, camera, blur, border, and watermark settings. Local wallpaper images and their file paths are never exported or imported; a wallpaper-based preset uses no background when opened on another Mac.
The recording picker provides one place to prepare a session:
Turning on the camera starts a live preview before recording begins, giving the camera time to settle exposure and white balance. Camera permission failures or disconnected optional devices do not throw away the screen recording; Screendrop warns and continues without that input.
For area recordings, the selected boundary remains visibly highlighted while the rest of the display is dimmed. The guide is click-through and excluded from the recording.
A floating control bar shows elapsed time and lets you:
Paste or type a script from the pre-record bar, choose how many lines to show, and enable the teleprompter for the next recording.
On a Mac with a notch, the script grows out of the hardware notch in a Dynamic Island-style panel. On other displays it appears as a floating pill below the menu bar. With a microphone enabled, Apple's on-device Speech Analyzer follows the spoken words, highlights progress, and advances the script automatically. Without a microphone, the script remains available as a static prompt.
The teleprompter and its speech tracking are best-effort and never interrupt the recording if recognition is unavailable.
Every new recording is stored as a non-destructive session package. The package preserves the screen master, optional camera master, input timeline, metadata, and a small editable project document. The original media stays untouched, and the project can be reopened from Library.
16:9, 9:16, 1:1, or 4:5.1:1, 16:9, 9:16, 4:3, or 3:2 handles; the background canvas and source recording remain unchanged.Screendrop records interaction data separately from the screen pixels, so presentation effects remain editable:
The camera remains a separate video track:
Narrated recordings can be transcribed entirely on-device with Apple's Speech Analyzer.
The result powers two workflows:
Studio exports the complete composition-screen, camera, backgrounds, zooms, cursor, click effects, keystrokes, captions, edits, speed changes, and selected audio-in one render.
Export Options includes quality, codec, resolution, format, 30 / 60 fps, Motion blur, and audio. The defaults remain 60 fps with motion blur enabled. Choose 30 fps and turn motion blur off to reduce rendering work, or keep either feature independently. Confirmed options are remembered for new recordings and saved with the project; Share uses the same project settings. Existing projects retain their original 60 fps and blur behavior until you change them.
Export and Share show progress, can be cancelled, and report completion. Renders are cached against the project state, including frame rate and motion blur, so exporting or sharing the same edit again can reuse finished work.
Studio uses Metal to accelerate eligible motion-blur frames. Blur-on uses a one-frame shutter at the selected frame rate; blur-off draws the screen once at each frame's camera position. Core Graphics remains available for unsupported frames and devices. See export performance for the rendering policy, benchmarks, and comparison workflow.
Screendrop also includes a lightweight trim-and-compress editor for regular video files. FFmpeg enables its conversion and compression options:
brew install ffmpeg
Cloud sharing is optional, self-hosted, and Cloudflare-first:
The companion Worker lives at:
github.com/fayazara/screendrop-worker

The fastest setup is built into Screendrop:
1. Open Settings → Cloud.
2. Copy the generated upload token.
3. Click Deploy to Cloudflare.
4. Paste the token when Cloudflare asks for the UPLOAD_TOKEN secret.
5. After deployment, copy the Worker URL back into Screendrop.
6. Click Verify Connection.
The deploy flow provisions the R2 and D1 bindings used by the Worker. For a manual deployment, configure the Worker with those bindings and store the token as a Worker secret:
npx wrangler secret put UPLOAD_TOKEN
Screendrop verifies the Worker URL and token before enabling uploads.
1. Screendrop sends the file to the Worker with PUT /api/upload.
2. The Worker validates the bearer token, streams the file to R2, and writes its metadata to D1.
3. The Worker returns a share URL. Screendrop copies it and stores it in the local Library.
4. For edited recordings, Screendrop uploads the rendered final cut-not the raw screen master.
5. Screendrop then adds best-effort video sidecars: a title, poster, transcript remapped to the edited timeline, and a storyboard sprite used for scrub previews.
The share link works as soon as the main upload finishes and becomes richer as the sidecars arrive.
Screendrop is local-first:
While this setting is enabled, a reminder below the pre-record bar warns that Screendrop windows will be captured. Turn off its switch to disable capture visibility immediately; the reminder disappears when the setting is off or recording begins.
Requirements:
Build from the command line:
DEVELOPER_DIR=/Applications/Xcode.app/Contents/Developer xcodebuild build \
  -project Screendrop.xcodeproj \
  -scheme Screendrop \
  -configuration Debug \
  -destination "platform=macOS"
There is no test target. A successful Xcode build is the automated verification gate.
The standalone motion-blur benchmark also compares the Metal renderer with Core Graphics and checks encoder interoperability and settled screen reuse without launching Screendrop. Editor performance documents image budgets, close/cancellation behavior, and standalone resource checks.
Screendrop includes a Go release helper. To run the complete archive, notarize, package, and publish flow:
```bash go run ./cmd/screendrop-r
→ →
→ →
→ →
→ →
→ →
→ →
→ →
→