1
 →
→
The most powerful and modular diffusion model GUI, api and backend with a graph/nodes interface.
[![Website][website-shield]][website-url]
[![Dynamic JSON Badge][discord-shield]][discord-url]
[![Twitter][twitter-shield]][twitter-url]
[![Matrix][matrix-shield]][matrix-url]
[![][github-release-shield]][github-release-link]
[![][github-release-date-shield]][github-release-link]
[![][github-downloads-shield]][github-downloads-link]
[![][github-downloads-latest-shield]][github-downloads-link]
[matrix-shield]: https://img.shields.io/badge/Matrix-000000?style=flat&logo=matrix&logoColor=white [matrix-url]: https://app.element.io/#/room/%23comfyui_space%3Amatrix.org [website-shield]: https://img.shields.io/badge/ComfyOrg-4285F4?style=flat [website-url]: https://www.comfy.org/
[discord-shield]: https://img.shields.io/badge/dynamic/json?url=https%3A%2F%2Fdiscord.com%2Fapi%2Finvites%2Fcomfyorg%3Fwith_counts%3Dtrue&query=%24.approximate_member_count&logo=discord&logoColor=white&label=Discord&color=green&suffix=%20total [discord-url]: https://discord.com/invite/comfyorg [twitter-shield]: https://img.shields.io/twitter/follow/ComfyUI [twitter-url]: https://x.com/ComfyUI
[github-release-shield]: https://img.shields.io/github/v/release/comfyanonymous/ComfyUI?style=flat&sort=semver [github-release-link]: https://github.com/comfyanonymous/ComfyUI/releases [github-release-date-shield]: https://img.shields.io/github/release-date/comfyanonymous/ComfyUI?style=flat [github-downloads-shield]: https://img.shields.io/github/downloads/comfyanonymous/ComfyUI/total?style=flat [github-downloads-latest-shield]: https://img.shields.io/github/downloads/comfyanonymous/ComfyUI/latest/total?style=flat&label=downloads%40latest [github-downloads-link]: https://github.com/comfyanonymous/ComfyUI/releases
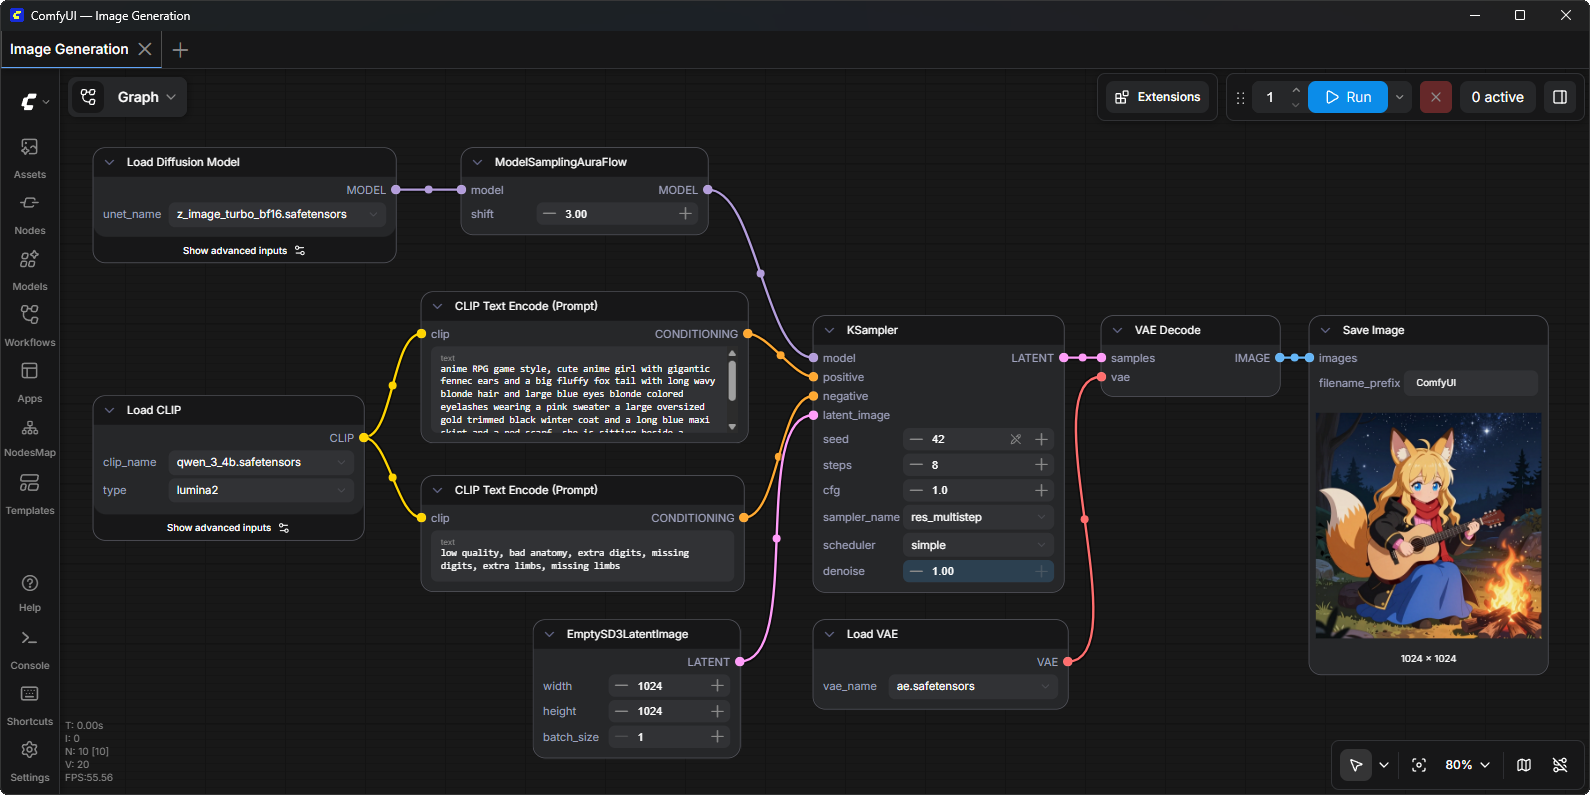
ComfyUI is the AI creation engine for visual professionals who demand control over every model, every parameter, and every output. Its powerful and modular node graph interface empowers creatives to generate images, videos, 3D models, audio, and more...
--disable-api-nodes to disable the optional paid Comfy API nodes and force all built-in functionality to stay offline.extra_model_paths.yaml.ComfyUI follows a weekly release cycle targeting Monday but this regularly changes because of model releases or large changes to the codebase. There are three interconnected repositories:
1. ComfyUI Core
| Keybind | Explanation |
|------------------------------------|--------------------------------------------------------------------------------------------------------------------|
| Ctrl + Enter | Queue up current graph for generation |
| Ctrl + Shift + Enter | Queue up current graph as first for generation |
| Ctrl + Alt + Enter | Cancel current generation |
| Ctrl + Z/Ctrl + Y | Undo/Redo |
| Ctrl + S | Save workflow |
| Ctrl + O | Load workflow |
| Ctrl + A | Select all nodes |
| Alt + C | Collapse/uncollapse selected nodes |
| Ctrl + M | Mute/unmute selected nodes |
| Ctrl + B | Bypass selected nodes (acts like the node was removed from the graph and the wires reconnected through) |
| Delete/Backspace | Delete selected nodes |
| Ctrl + Backspace | Delete the current graph |
| Space | Move the canvas around when held and moving the cursor |
| Ctrl/Shift + Click | Add clicked node to selection |
| Ctrl + C/Ctrl + V | Copy and paste selected nodes (without maintaining connections to outputs of unselected nodes) |
| Ctrl + C/Ctrl + Shift + V | Copy and paste selected nodes (maintaining connections from outputs of unselected nodes to inputs of pasted nodes) |
| Shift + Drag | Move multiple selected nodes at the same time |
| Ctrl + D | Load default graph |
| Alt + + | Canvas Zoom in |
| Alt + - | Canvas Zoom out |
| Ctrl + Shift + LMB + Vertical drag | Canvas Zoom in/out |
| P | Pin/Unpin selected nodes |
| Ctrl + G | Group selected nodes |
| Q | Toggle visibility of the queue |
| H | Toggle visibility of history |
| R | Refresh graph |
| F | Show/Hide menu |
| . | Fit view to selection (Whole graph when nothing is selected) |
| Double-Click LMB | Open node quick search palette |
| Shift + Drag | Move multiple wires at once |
| Ctrl + Alt + LMB | Disconnect all wires from clicked slot |
Ctrl can also be replaced with Cmd instead for macOS users
We highly recommend using the desktop app:
The desktop app is the easiest and best way to use ComfyUI for new users.
There is a portable standalone build for Windows that should work for running on Nvidia GPUs or for running on your CPU only. It is not recommended for regular users. Regular users should use the desktop app above.
Direct link to download (nvidia)
Simply download, extract with 7-Zip or with the windows explorer on recent windows versions and run. For smaller models you normally only need to put the checkpoints (the huge ckpt/safetensors files) in: ComfyUI\models\checkpoints but many of the larger models have multiple files. Make sure to follow the instructions to know which subfolder to put them in ComfyUI\models\
If you have trouble extracting it, right click the file -> properties -> unblock
The portable above currently comes with python 3.13 and pytorch cuda 13.0. Update your Nvidia drivers if it doesn't start.
Portable for Nvidia GPUs (supports 20 series and above).
Portable for Nvidia GPUs with pytorch cuda 12.6 and python 3.12 (Supports Nvidia 10 series and older GPUs, DO NOT USE THIS ON NEWER 20 SERIES AND ABOVE GPUS).
See the Config file to set the search paths for models. In the standalone windows build you can find this file in the ComfyUI directory. Rename this file to extra_model_paths.yaml and edit it with your favorite text editor.
You can install and start ComfyUI using comfy-cli:
pip install comfy-cli
comfy install
Python 3.14 works but some custom nodes may have issues. The free threaded variant works but some dependencies will enable the GIL so it's not fully supported.
Python 3.13 is very well supported. If you have trouble with some custom node dependencies on 3.13 you can try 3.12
torch 2.7 is minimally supported but using a newer version is extremely recommended. Using a cu130 or above version of pytorch is required on Nvidia 20 series and above. Some features and optimizations might only work on newer versions. We generally recommend using the latest major version of pytorch with the latest cuda version unless it is less than 2 weeks old. If your pytorch is more than 6 months old, please update it.
Git clone this repo.
Put your SD checkpoints (the huge ckpt/safetensors files) in: models/checkpoints
Put your VAE in: models/vae
AMD users can install rocm and pytorch with pip if you don't have it already installed, this is the command to install the stable version:
```pip install torch torchvision torchaudio --index-url https://download.pytorch.org/whl/rocm7.2
This is the command to install the nightly with ROCm 7.2 which might have some performance improvements:
AMD GPUs (Windows, ROCm 10.0)
Use AMD's multi-architecture PyTorch packages. The device-* extras install your GPU's kernels and the matching ROCm runtime automatically; a separate HIP SDK installation is not needed.
Use Windows 11, a current AMD graphics driver, and 64-bit Python 3.13.
The install command below uses device-all to install kernels for all supported GPUs. To reduce download size and disk usage, optionally replace both occurrences of device-all with the target for your GPU:
| GPU | Device extra |
| --- | --- |
| RX 9070 / XT, Radeon AI PRO R9700 | device-gfx1201 |
| RX 9060 / XT | device-gfx1200 |
| RX 7900 XT / XTX | device-gfx1100 |
| RX 7700 XT / 7800 XT | device-gfx1101 |
| RX 7600 / XT | device-gfx1102 |
| Ryzen AI Max / Max+ (Strix Halo) | device-gfx1151 |
Note: This table only lists examples. A GPU missing from it may still be supported: supported architectures include RDNA 2, RDNA 3, RDNA 3.5, and RDNA 4. Keep device-all to install kernels for all supported targets. For other models, see AMD's GPU target table and ROCm compatibility matrix.
ROCm 10.0.0 with PyTorch 2.13:
Intel GPUs (Windows and Linux)
Intel Arc GPU users can install native PyTorch with torch.xpu support using pip. More information can be found here
1. To install PyTorch xpu, use the following command:
This is the command to install the Pytorch xpu nightly which might have some performance improvements:
NVIDIA
Nvidia users should install stable pytorch using this command:
This is the command to install pytorch nightly instead which might have performance improvements.
Troubleshooting
If you get the "Torch not compiled with CUDA enabled" error, uninstall torch with:
And install it again with the command above.
Dependencies
Install the dependencies by opening your terminal inside the ComfyUI folder and:
After this you should have everything installed and can proceed to running ComfyUI.
Others:
Apple Mac silicon
You can install ComfyUI in Apple Mac silicon (M1, M2, M3 or M4) with any recent macOS version.
1. Install pytorch nightly. For instructions, read the Accelerated PyTorch training on Mac Apple Developer guide (make sure to install the latest pytorch nightly).
1. Follow the ComfyUI manual installation instructions for Windows and Linux.
1. Install the ComfyUI dependencies. If you have another Stable Diffusion UI you might be able to reuse the dependencies.
1. Launch ComfyUI by running python main.py
Note: Remember to add your models, VAE, LoRAs etc. to the corresponding Comfy folders, as discussed in ComfyUI manual installation.
Ascend NPUs
For models compatible with Ascend Extension for PyTorch (torch_npu). To get started, ensure your environment meets the prerequisites outlined on the installation page. Here's a step-by-step guide tailored to your platform and installation method:
1. Begin by installing the recommended or newer kernel version for Linux as specified in the Installation page of torch-npu, if necessary.
2. Proceed with the installation of Ascend Basekit, which includes the driver, firmware, and CANN, following the instructions provided for your specific platform.
3. Next, install the necessary packages for torch-npu by adhering to the platform-specific instructions on the Installation page.
4. Finally, adhere to the ComfyUI manual installation guide for Linux. Once all components are installed, you can run ComfyUI as described earlier.
Cambricon MLUs
For models compatible with Cambricon Extension for PyTorch (torch_mlu). Here's a step-by-step guide tailored to your platform and installation method:
1. Install the Cambricon CNToolkit by adhering to the platform-specific instructions on the Installation
2. Next, install the PyTorch(torch_mlu) following the instructions on the Installation
3. Launch ComfyUI by running python main.py
Iluvatar Corex
For models compatible with Iluvatar Extension for PyTorch. Here's a step-by-step guide tailored to your platform and installation method:
1. Install the Iluvatar Corex Toolkit by adhering to the platform-specific instructions on the Installation
2. Launch ComfyUI by running python main.py
ComfyUI-Manager
ComfyUI-Manager is an extension that allows you to easily install, update, and manage custom nodes for ComfyUI.
Setup
1. Install the manager dependencies:
2. Enable the manager with the --enable-manager flag when running ComfyUI:
Command Line Options
| Flag | Description |
|------|-------------|
| --enable-manager | Enable ComfyUI-Manager |
| --enable-manager-legacy-ui | Use the legacy manager UI instead of the new UI (implies --enable-manager) |
| --disable-manager-ui | Disable the manager UI and endpoints while keeping background features like security checks and scheduled installation completion (requires --enable-manager) |
Running
For AMD cards not officially supported by ROCm
Try running it with this command if you have issues:
For 6700, 6600 and maybe other RDNA2 or older:
For AMD 7600 and maybe other RDNA3 cards: You ca
→ →
→ →
→ →
→ →
→ →
→